If you’re here, you’ve probably heard the buzz around Amazon Creator Connections. Creator Connections is a great way to expand your affiliate partnerships and drive off-Amazon traffic to your store. Below, we’ll walk through how to launch an Amazon Creator Connections campaign in your Sellers Central dashboard.
Step 1 – Amazon Seller Central
You’ll want to log into your Seller Central account. Make sure you have the proper privileges in order to access the Creator Connections section.
Step 2 – Creator Connections Dashboard
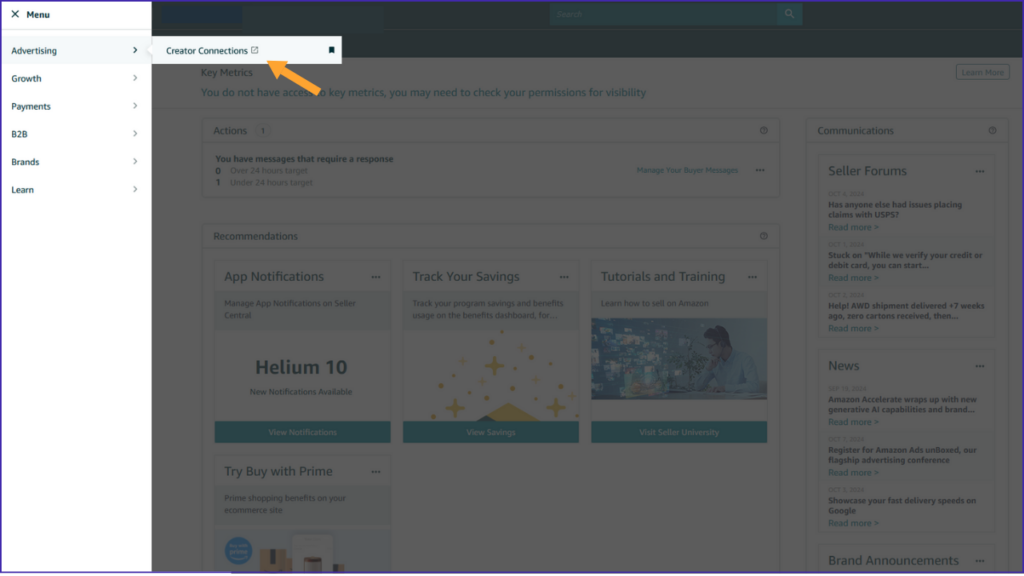
Once you’re logged in, click on the menu bar in the upper left and navigate to “Advertising”and then click on “Creator Connections”. This will take you to your Creator Connections dashboard.
Step 3 – Create a New Campaign
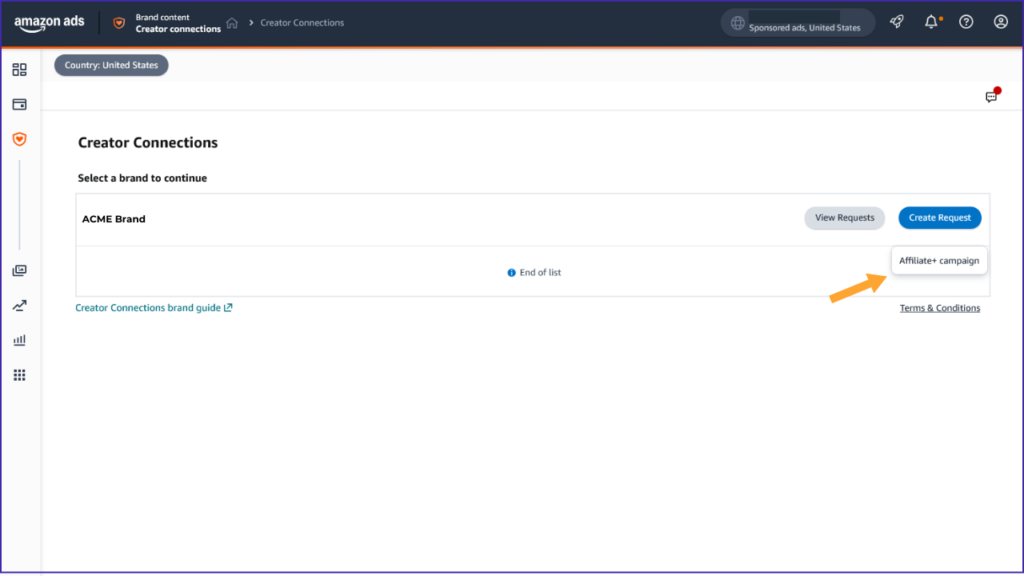
From your Creator Connections dashboard, you’ll see options to View Requests or Create Requests for each of your brands or stores. You can think of Requests as Campaigns. To create your first Campaign, click on the Request button and then select “Affiliate + Campaign”.
Step 4 – Complete The Details Of Your Creator Connection Campaign
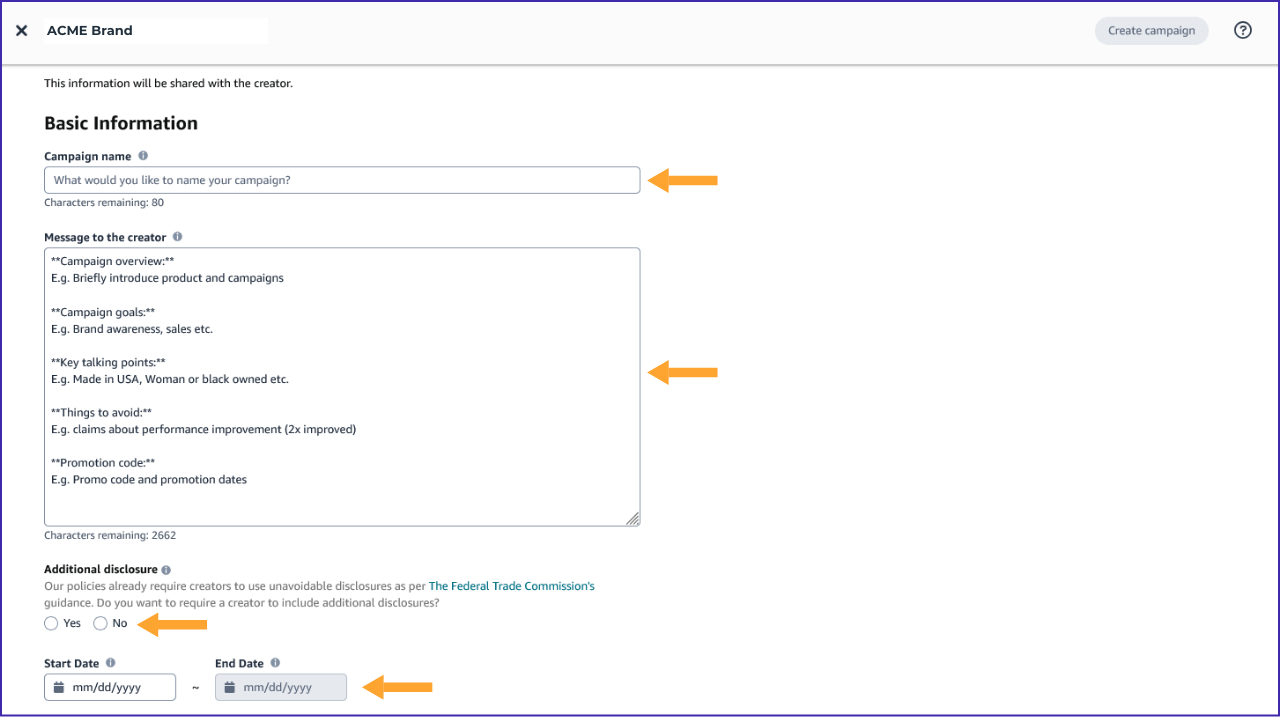
You’ll now see a page where you will populate the details of your Campaign.
You’ll first want to select a name for your campaign. If you’re planning to launch multiple campaigns, you’ll want to factor this into your name scheme.
Next, you’ll complete a campaign overview in the “Message to Creator” section. This should include items like: An intro to your company, the products included in the campaign, product talking points, your goals for the campaign and consumer promotions. You can also provide links to external marketing resources.
There’s a section for additional disclosures that you’d like to require from affiliates. Amazon’s creator policies already account for the FTC’s affiliate disclosure requirements so you do not need to include that.
You’ll need to put a start and end date for the campaign. Remember that once you start a campaign, and it goes beyond the 24 hour cancellation window, you can’t cancel it before the end date.
{continue to the last steps of your campaign details below}
Next is the payment section. This includes the Campaign Budget and creator commission rate. The commission rate is what you’re willing to pay creators for each sale they generate. This is calculated as a percentage of the sale amount AFTER discounts. The budget question might make you nervous, but don’t worry, this is only for the creator commissions. And you only accrue commissions when sales are being generated. Assuming you’d like to generate a lot of sales, then set this to a fairly high amount.
And the last step in the process is to select the products that you want to include in the campaign. You can do this by searching through your product list and adding products individually… by pasting in a set of products or by uploading a product list.
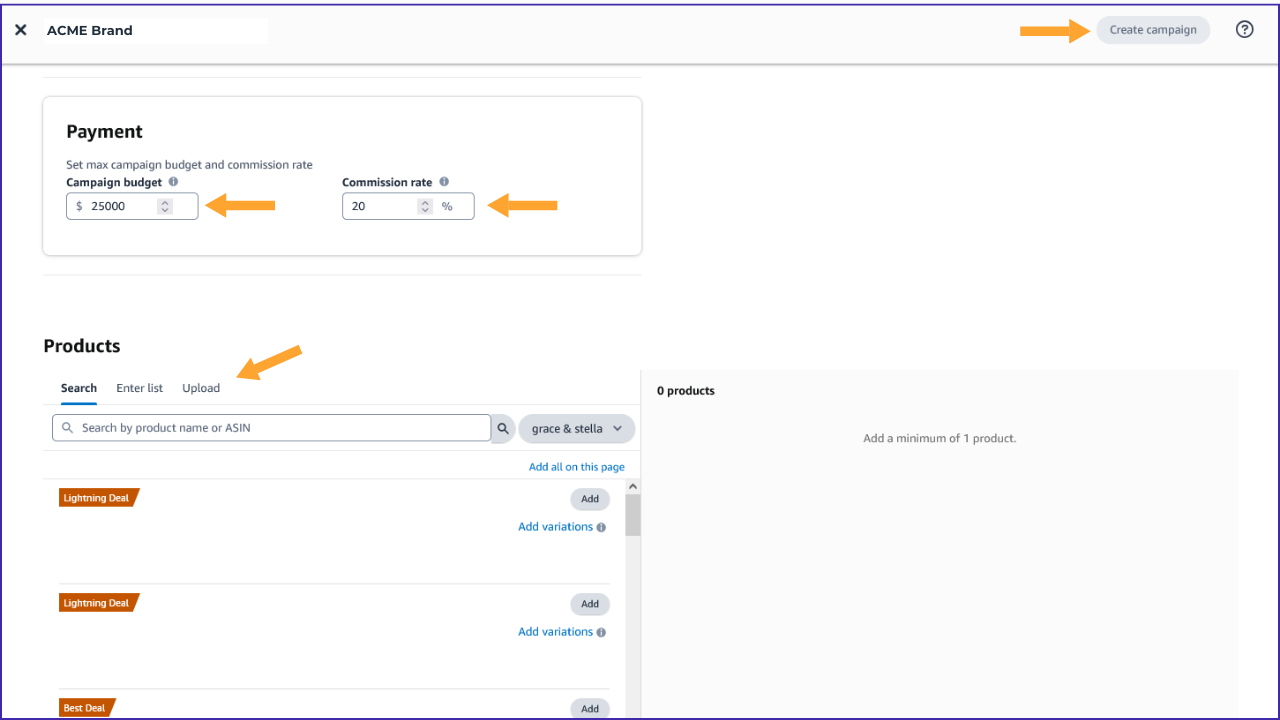
Once you’ve completed all the steps on your Campaign Details page, you can click the launch button in the upper right hand corner.
You now have a live Creator Connections campaign!
Management of these programs can get complex quickly, so if you need help, feel free to reach out to our team. We’ve helped hundreds of Amazon Sellers grow their sales through Creator Connections and direct Amazon Affiliate Programs.